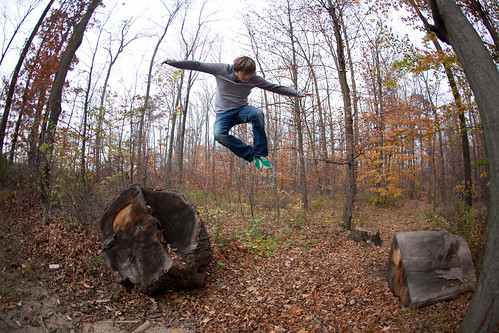
This Fix-it Friday photo was submitted by Angie Arthur, an IHF contributor. Here is the original photo:

And here is my edit (image is clickable to see it larger):

I'm so proud of myself! I did this edit using no actions of any kind. My workflow using PS CS5:
~First I duplicated the original and renamed it.
~Cloned out distracting bit (big leaf, bottle?) from the lower left.
~Levels adjustment layer to brighten image and lighten midtones, 0/1.47/241.
~Brightness/contrast adjustment layer, increased contrast +50.
~Select->Color Range->Highlights, copy to new layer. Put a blue to white gradient overlay set to multiply over the highlights to change the sky to blue, then masked off highlights on leaves and boy.
~Added center fill light at 20%.
~Hue/saturation adjustment layer, increased saturation +30, decreased brightness -5.
~Vignette set to overlay at 20%.
~High pass sharpening layer.
Thanks for looking and come check out the other edits at i heart faces!


oooohhhh love this edit. i tried to play with it this morning but couldnt get any anything to come of my madness!
ReplyDeleteGreat edit. Wish I knew how to do all that stuff manually like center fill. :)
ReplyDeleteDigital Paradise, it's easy! You can use a radial gradient fill with a light creamy color as the first color stop and transparent as the second stop. Then adjust blend mode and opacity to suit your particular photo's needs!
ReplyDelete